Video graphics adapter (VGA) or video graphics array (VGA) is one of the most common types of graphic cards in PCs. It’s often used to connect a monitor to a computer and display its output. VGA also handles most of the graphics processing, meaning it’s extremely important.
If your VGA graphics card suddenly stops working, you’re not alone. A VGA graphics card is one of the most common problems that Windows 10 users face. Luckily, there are several solutions you can try to resolve this issue on your own.
In this tutorial, we’ll show you how to fix VGA problems and restore the functionality of your VGA card on a Windows 10 PC. We’ll discuss what causes VGA problems, how to diagnose and fix VGA problems, and how to troubleshoot VGA problems.
What Causes VGA Problems?
VGA problems are often caused by faulty drivers, outdated system files, and third-party software.
If the problem is with your drivers or your graphics card’s drivers, it might be worth updating them to see if that fixes the problem for you. You can try updating the driver using Windows 10 Device Manager or by going to the manufacturer’s website. However, if you have an NVIDIA or AMD graphics card, you will not be able to update the driver on your own. In this case, you’ll need to contact customer support for assistance and they will provide a new device driver for you.
Outdated system files also cause VGA problems because old system files slow down your PC and may interfere with software installation. Checking for and updating outdated system files is a quick way to fix this issue – simply go to Control Panel > System and Security > View Installed Updates, scroll through the list of installed updates until you find one that says “System File Update,” then select it and click “update.” If there are no updates available for this category, manually check Windows Update for any patches; if there are no updates from either of those sources, install Microsoft Security Essentials (MSE) instead as it always has up-to-date patches in its database. Third-party software is usually responsible for VGA problems when it causes Windows 10 errors like those caused by malware infections.
Diagnose and fix VGA problems
When your VGA graphics card becomes non-functional, you’ll want to diagnose and fix the problem as soon as possible. One of the first steps you can take is to use Windows Defender. Windows Defender will scan your computer for viruses and other malware that could be causing problems with your VGA card. If it doesn’t find anything, you may want to try installing a different driver for your VGA card. Drivers are often the culprit when a PC component stops working.
In order to find the right driver for your VGA card, you might have to go through a little bit of trial and error. But it’s worth exploring every option in order to restore the functionality of your VGA card on Windows 10. You can also try updating Windows 10 or updating drivers for other components connected to the motherboard, such as USB or Ethernet ports devices, before concluding that your VGA card is defective.
If nothing has worked so far, then it’s likely that there is something wrong with your graphics card itself and not just drivers or software. In this case, you should contact customer support and troubleshoot any hardware issues on their end as well.
How to troubleshoot VGA problems
There are a number of reasons why your PC might be experiencing VGA problems.
Some of the most common issues include:
- Faulty driver – The software on your computer is responsible for translating the commands needed to display images on your screen. If there’s an issue with the driver, it could cause VGA problems.
- · Faulty hardware– If a component in your computer has failed, it could lead to VGA problems. For example, if you have a damaged video card or bad RAM, it will make it difficult for your graphics card to function properly.
- · Outdated Graphic Card Drivers – Your graphics card may not be receiving updates after they’ve been released by the manufacturer. In this case, you need to update your graphic card drivers so that you can use them again with Windows 10.
If you’re experiencing VGA problems and want to troubleshoot them using these steps, follow these instructions:
· Step 1: Update Video Card Drivers
Oftentimes outdated graphic card drivers are the cause for video graphics adapter (VGA) problems on Windows 10 PCs. To update your drivers:
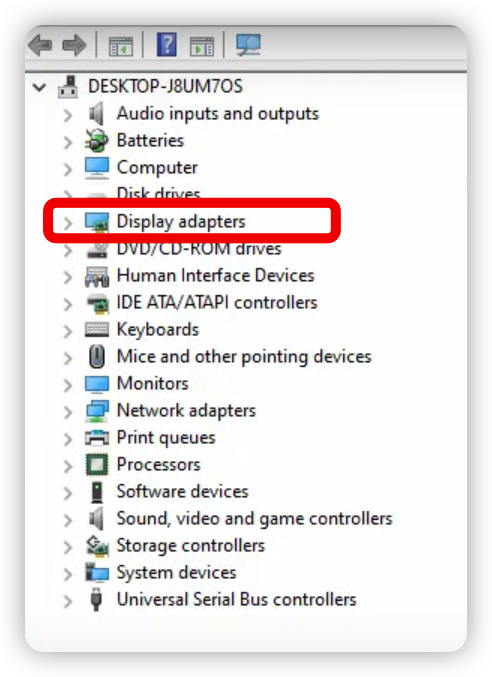
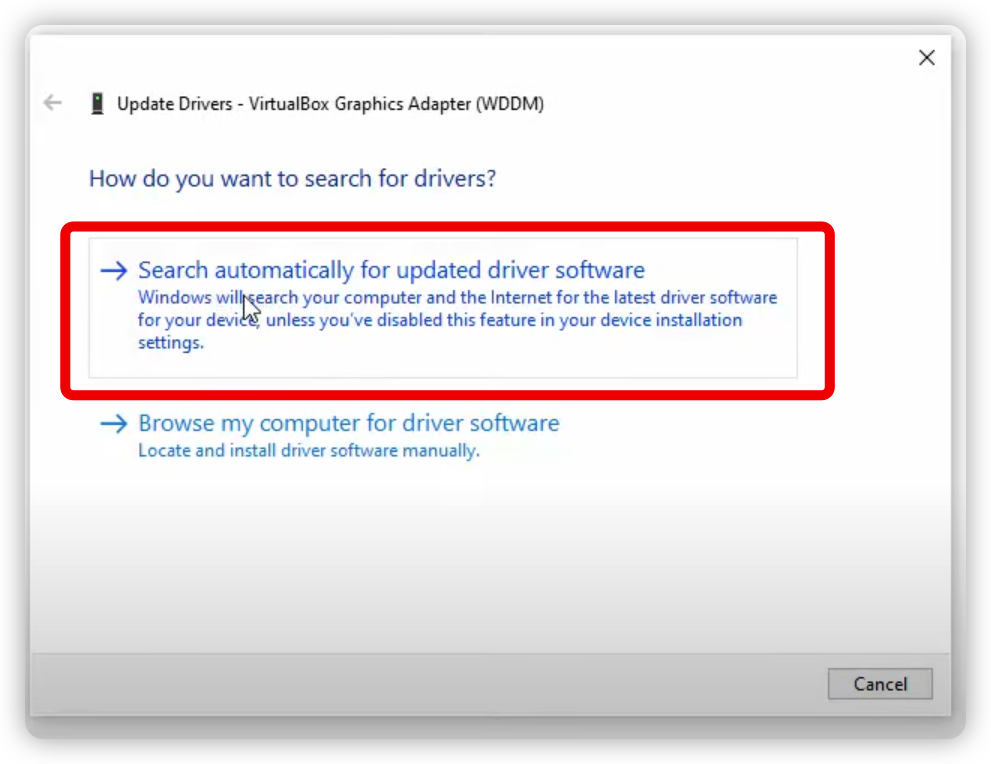
Click on the Windows icon > open Device Manager

Then double-click on Display Adapters > Update Driver
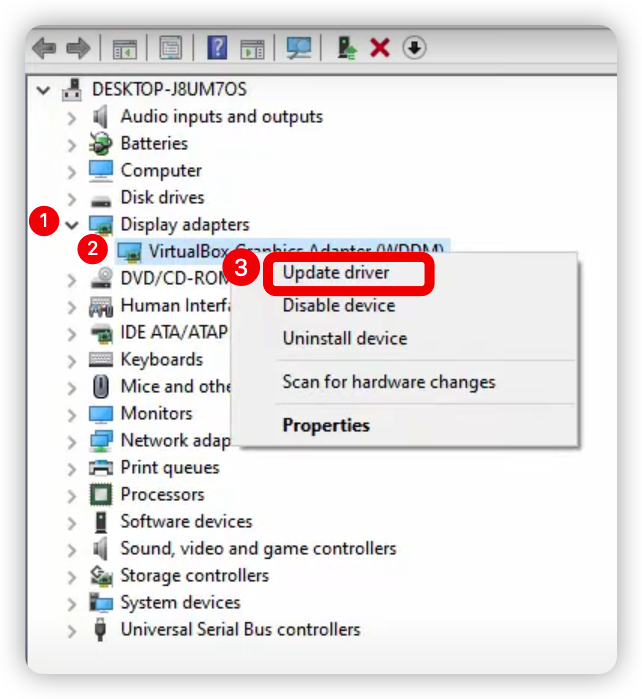
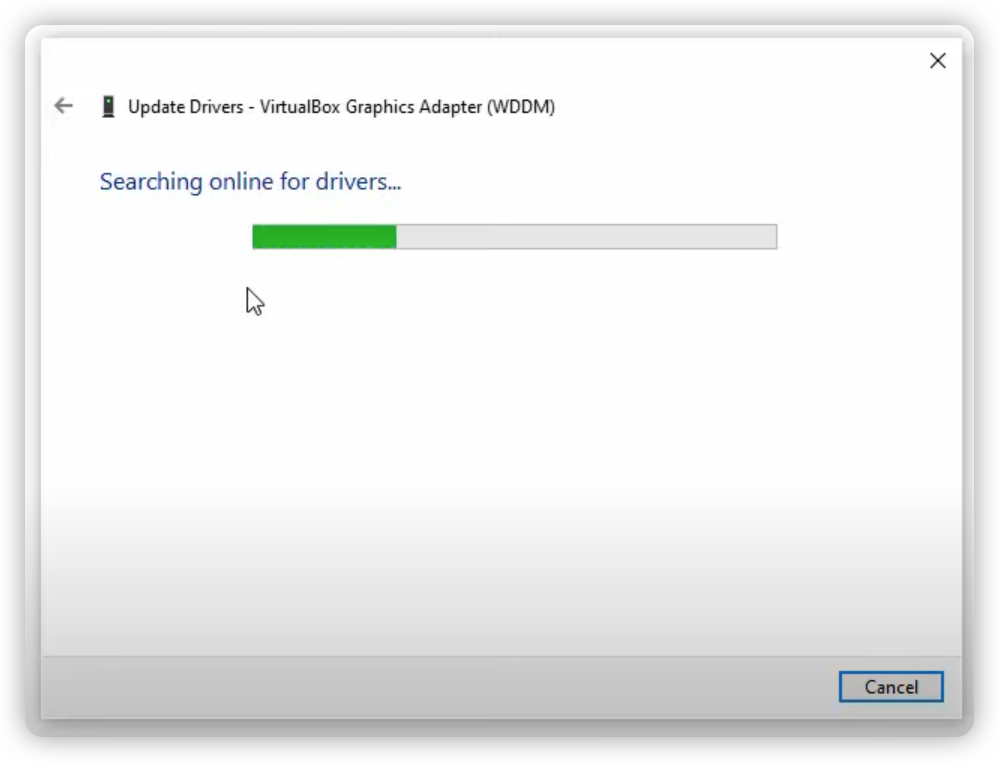
Search automatically for updated driver software
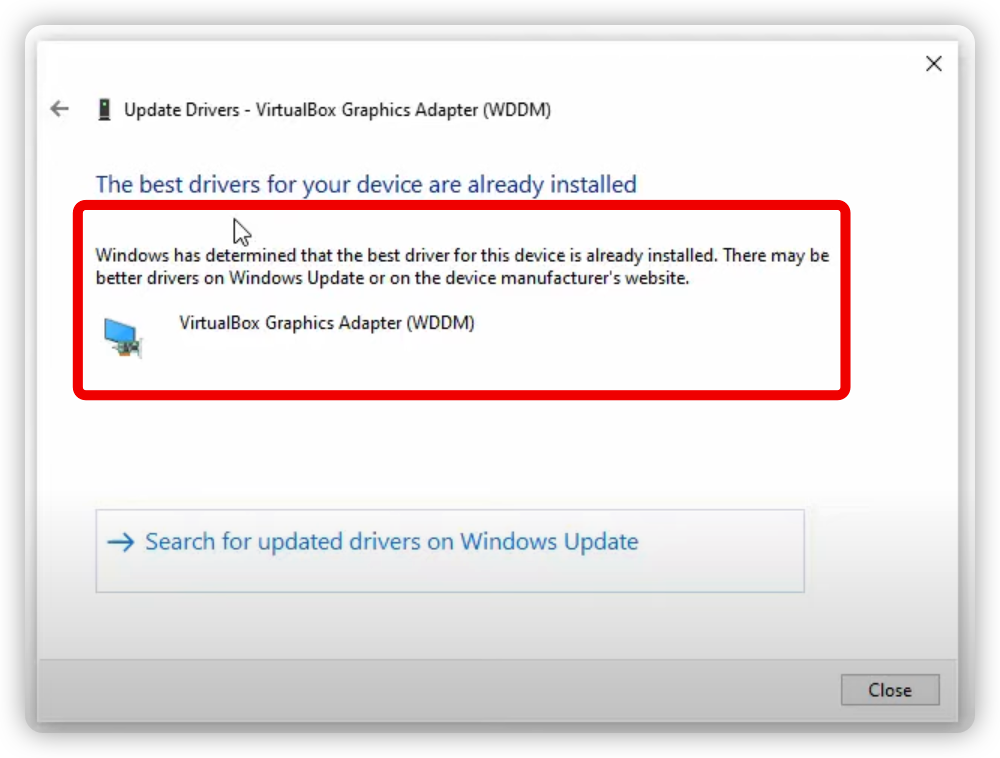
You should also check if there are any updates available from the manufacturer’s website of your graphics card, as well as from Microsoft’s website.
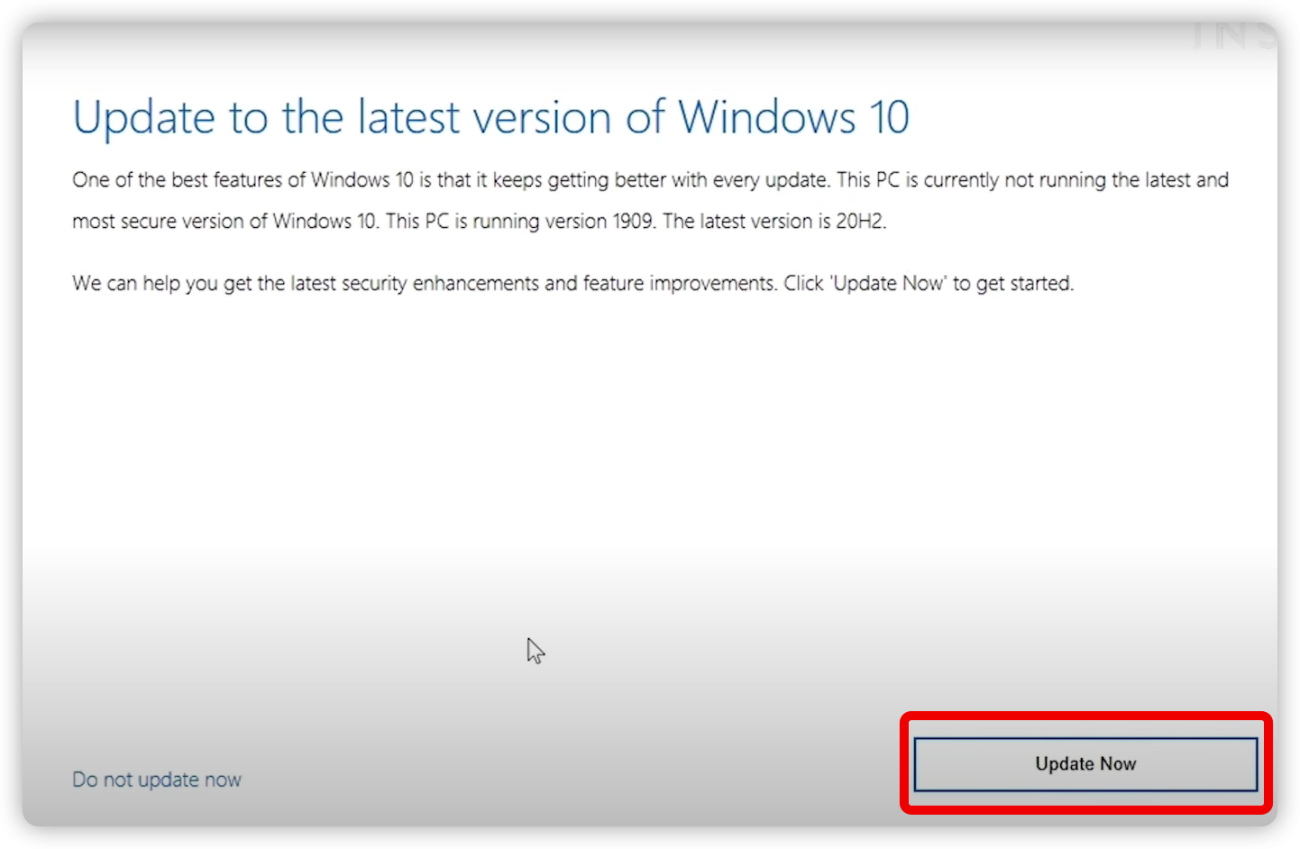
Step 2: Update Windows 10
If you’ve updated your graphics card drivers but are still experiencing VGA problems, then you need to update Windows 10. You can do this by going to Settings > Update & Security > Check for Updates. If there are some updates available, install them and restart your computer.
· Step 3: Run Hardware Diagnostics
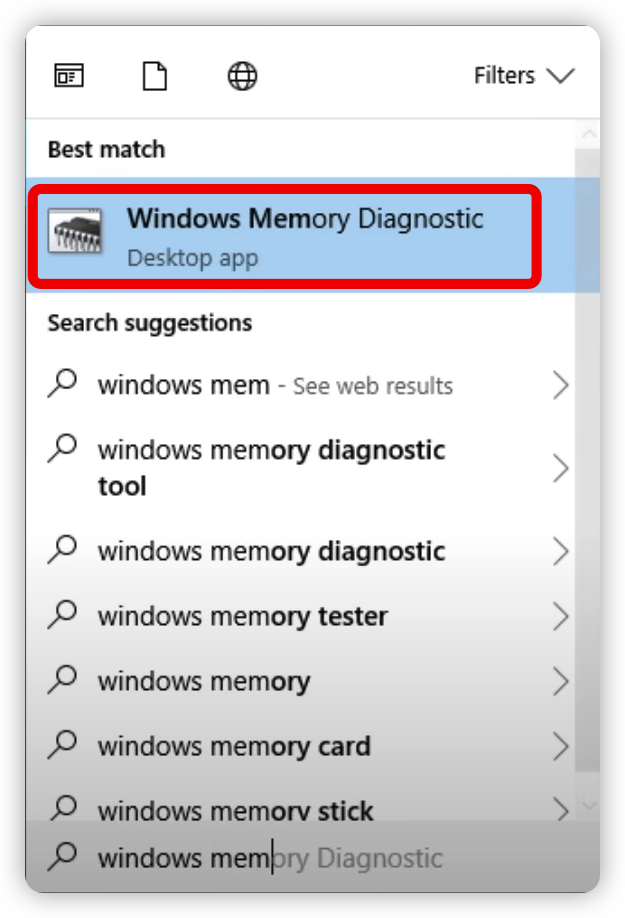
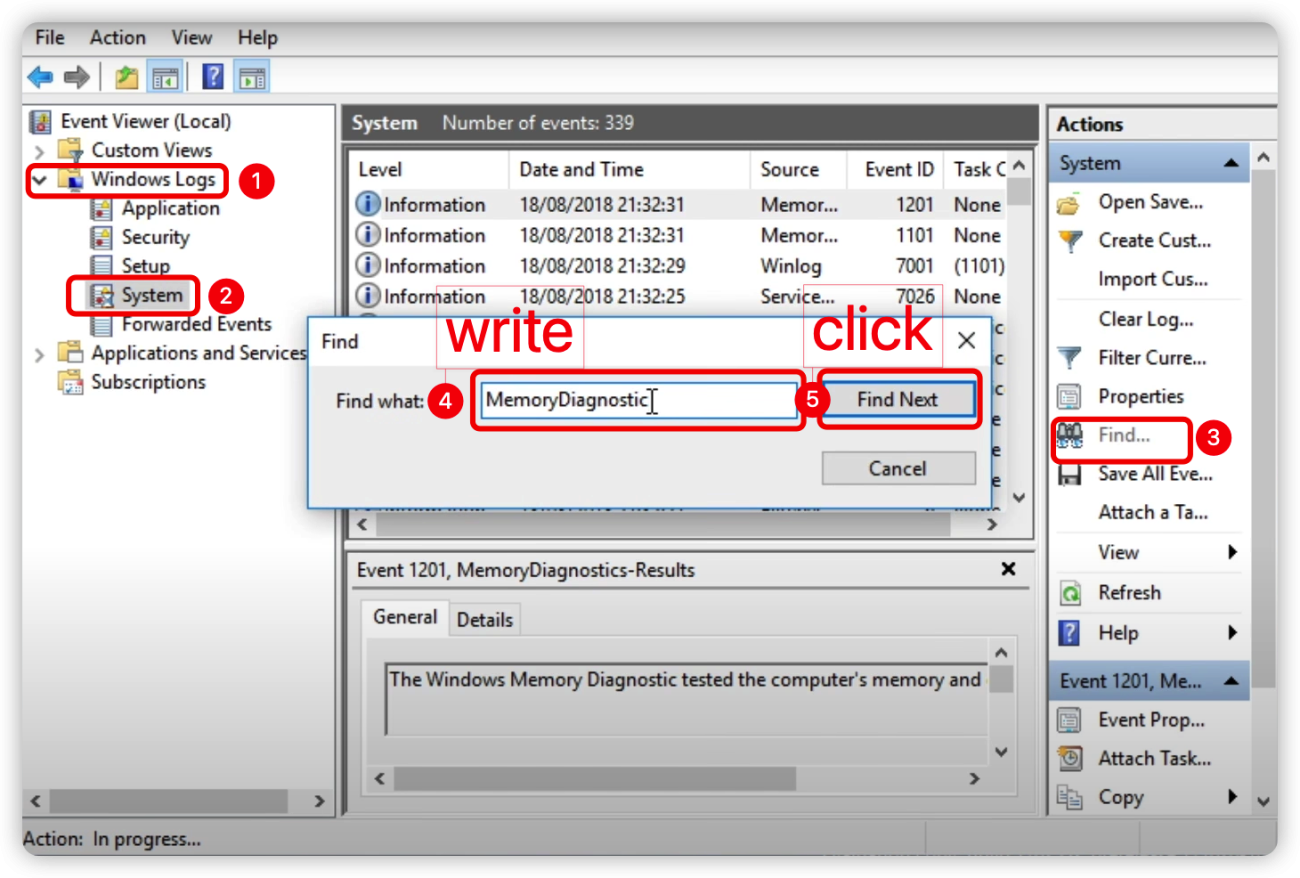
Once you’ve updated Windows 10 and your graphics card drivers, run a hardware diagnostic tool like the Windows Memory Diagnostics Tool:
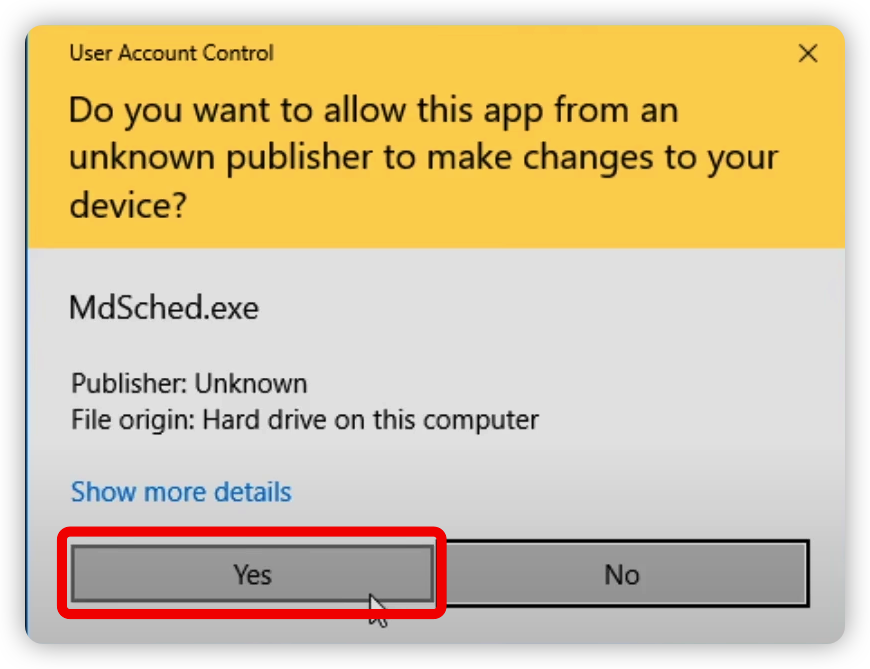
- Click Start Menu and type: Windows Memory Diagnostic
- In the next window, click Yes
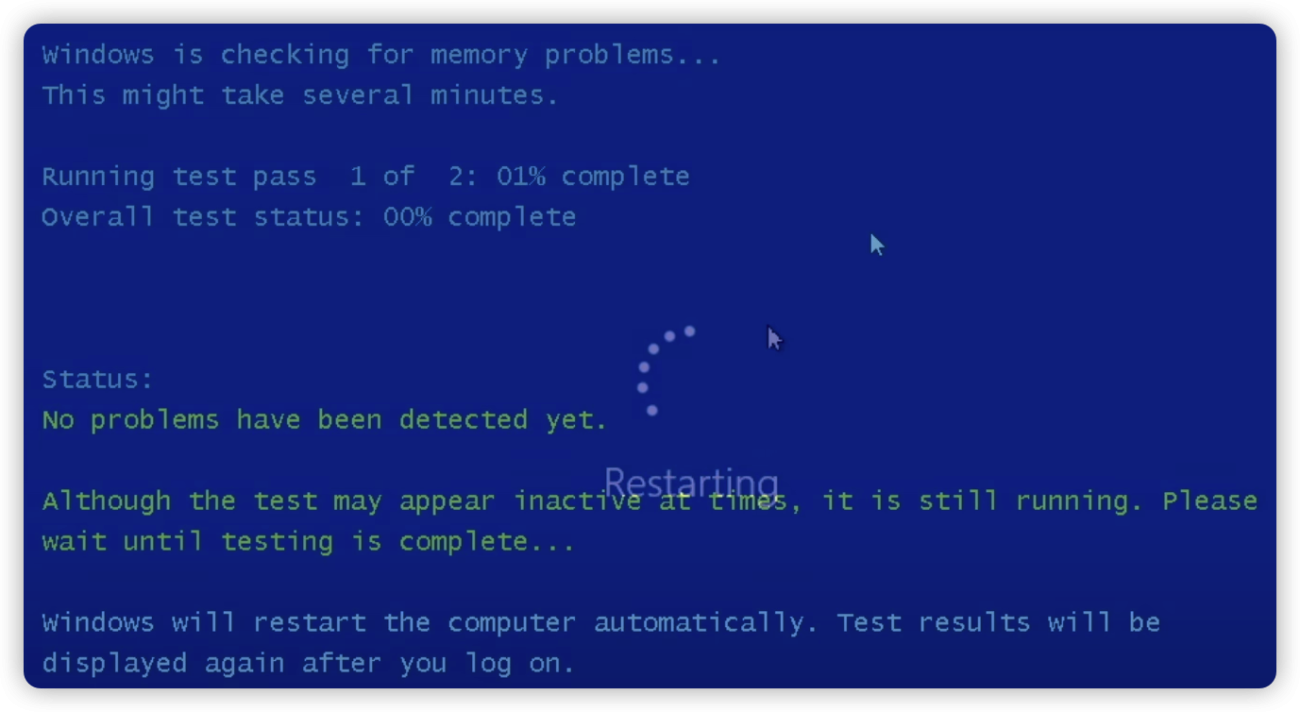
- Choose: Restart now and check for prolems

- After the system reboots back into Windows: Press the Windows key in X then select Event Viewer from the power menu

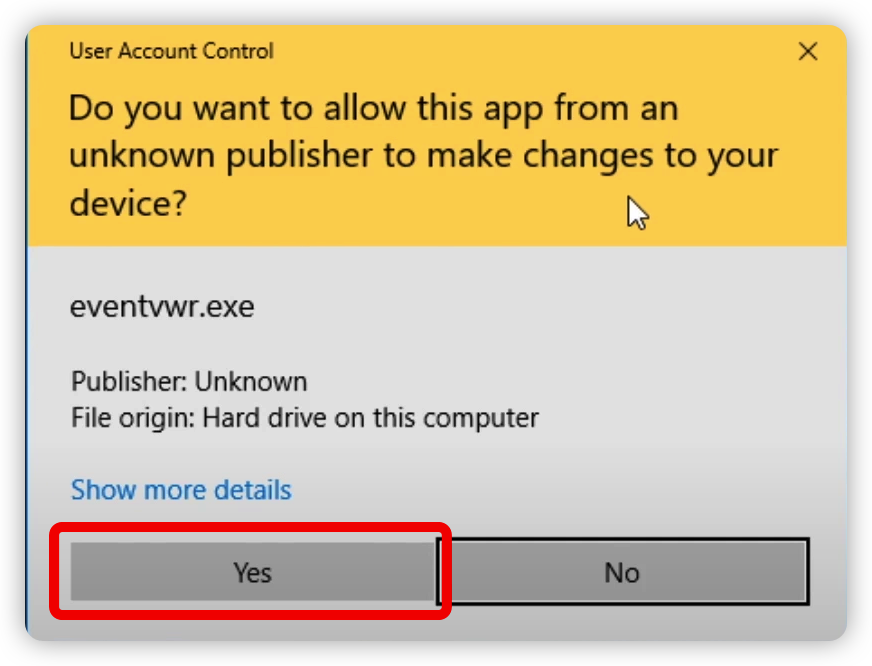
- When the Event Viewer opens select: Windows logs > system > find search for memory diagnostic
· Step 4: Run the System File Checker Tool (SFC)
The System File Checker tool scans for missing or corrupted system files and replaces them with fresh copies. It is a great tool to use especially if you’ve recently tried installing a new program and experience VGA issues.
· Step 5: Run the Memory Diagnostics Tool (MEM)
The MEM tool checks the status of your computer’s RAM, including how much memory you have installed, how much memory is available, and how much memory is in use. If it finds any errors or issues with your computer’s RAM, it will attempt to fix them automatically by replacing bad sections of memory with good ones.
· Step 6: Run chkdsk
If you still have VGA problems after trying all of the above solutions, then run a disk check using chkdsk. You can do this by going to Start > type CMD > Right-click CMD > select Run as Administrator > type CHKDSK /F /X (where X = drive letter) and hit Enter.
Conclusion
VGA problems are never a good thing, but with a little research and troubleshooting, the problem can be quickly resolved.